I’m messing around a bit with the new NSX-T 3.0 in my lab. I just deployed the NSX-T VM (blog posts will follow about that topic) and I wanted to secure it a bit with a certificate which is signed by my internal PKI.
To set this all up you need 3 things:
- NSX-T manager (duh)
- Windows PKI with web-enrollment (wel, the web-enrollment isn’t required, but makes your life easy)
- Postman, or another REST API client
First things first. We need a ‘good’ template for our NSX-T manager that we can request via the web interface. From what I see, the template has 3 important settings:
- SAN name needs to be provided in the request
- Cert needs to be published in AD (or the webservice won’t create it)
- The basic constraints extension needs to be enabled on the template, or the NSX manager will complain about it…
Certificate Template
So, my template looks like this (start with a copy of the Web-Server template):
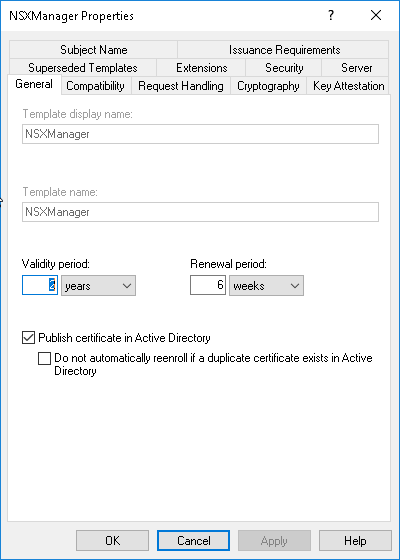
Give the template a clear name. Try to avoid using spaces in the template names. It might give issues when you want to use it later on. Make sure “Publish certificate in Active Directory” is checked if you are using an AD integrated CA.
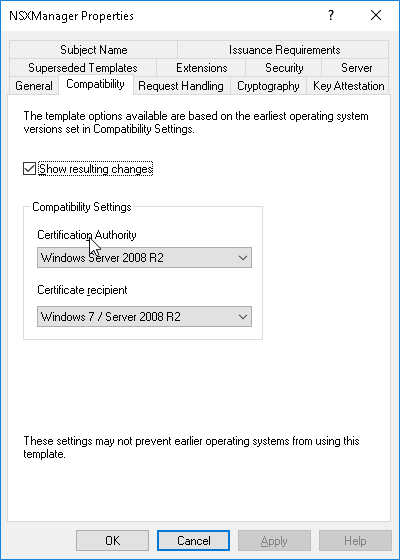
We need to set the compatibility to a MAX of W2K8R2. The same for the Recipient. If we put this higher, we won’t be able to request the template in the webservice. If we put the recipient too low, we won’t be able to enable the basic constraints extension.

I usually allow the private key to be exported.
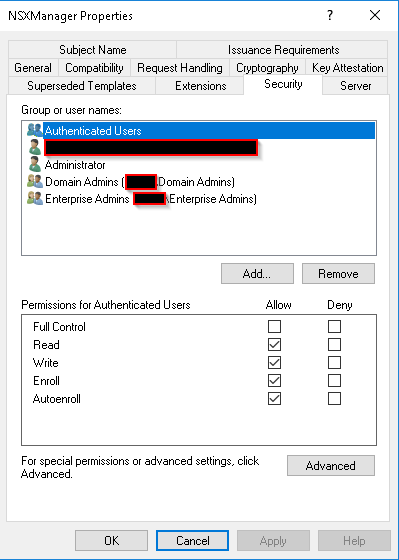
Make sure the correct users and groups have the needed rights (Autoenroll might not be needed for this one).
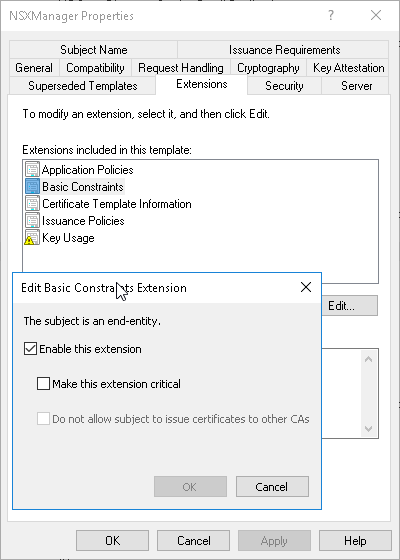
Make sure the Basic Contraints Extension is enabled.
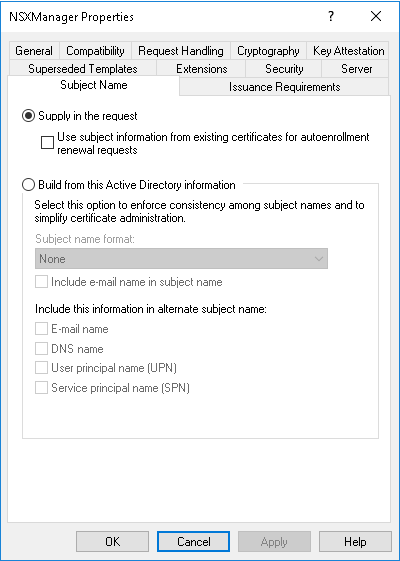
Make sure the Subject Name is set to “Supply in the request”.

If you use LDAP revocation URL’s, you might want to disable the revocation information to work around this issue.
Add this template to your CA.
CSR Creation
To Generate the CSR, navigate to the NSX manager’s “system” tab and select “Certificates” in the left-hand menu. Go to the “CSR’s” tab.
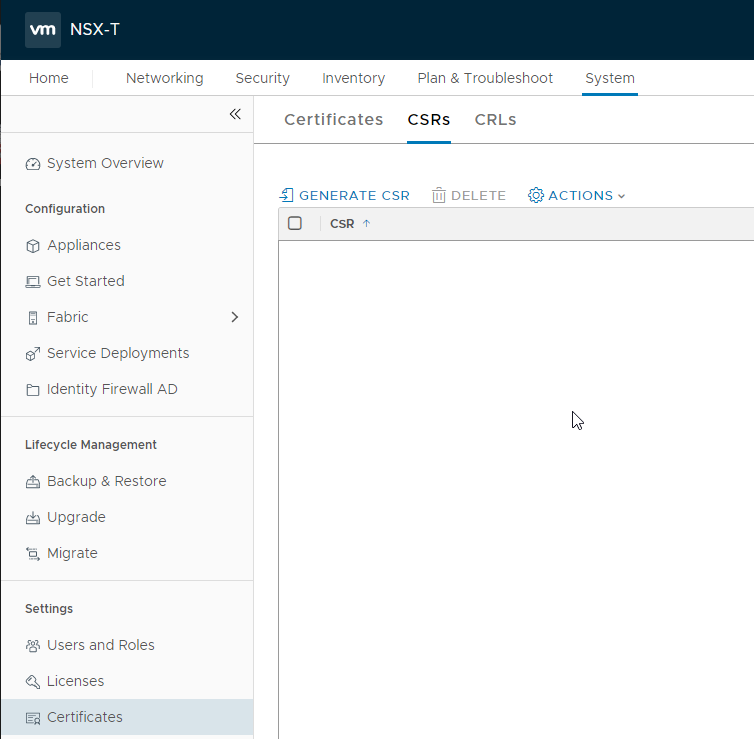
Click on “Generate CSR”. Fill in the form. The most important value is the “common name”.
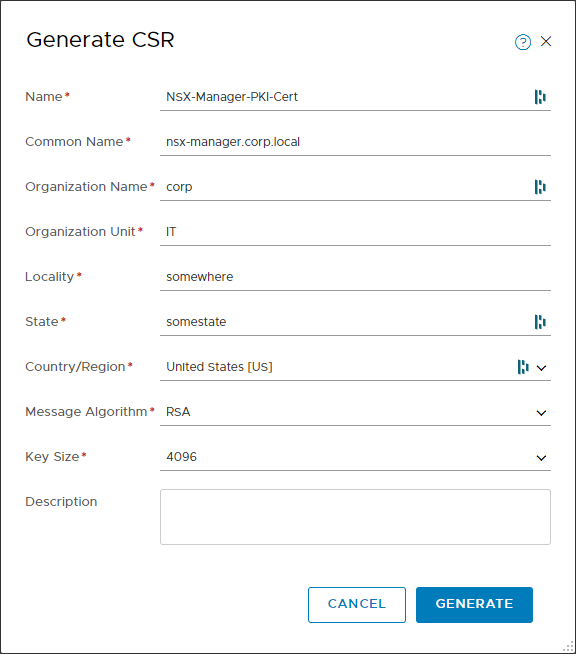
Click on Generate. The new CSR will show in the list. If you click on it, you can copy the CSR data:
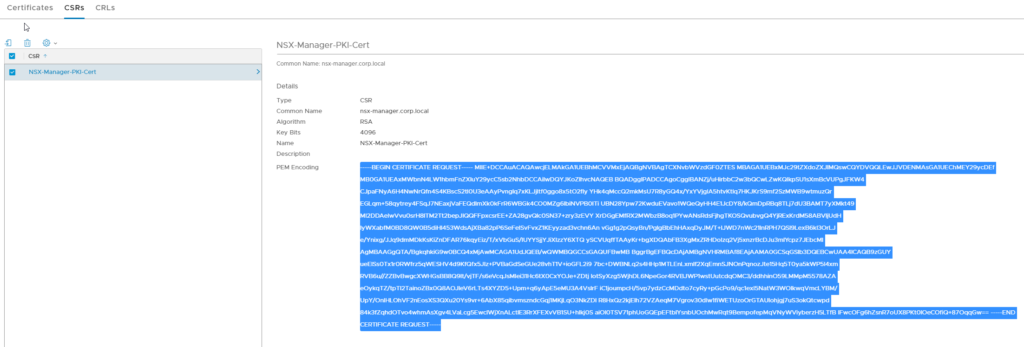
Use this data to sign the Certificate in your PKI using the newly created template. Don’t forget to add the SAN attributes. The CA must be setup to sign certificates with SAN attributes. This can be done by pasting the following in an admin powershell prompt on the CA:
certutil -setreg policy\EditFlags +EDITF_ATTRIBUTESUBJECTALTNAME2
Restart the CA Cervice afterwards:
net stop certsvc
net start certsvc
now you can use the SAN attributes:
san:dns=nsx-manager.corp.local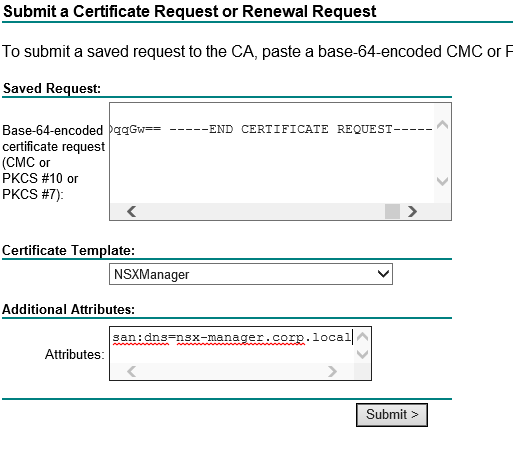
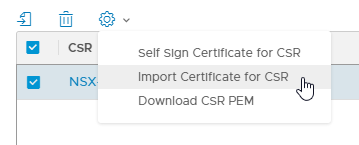
After retrieving the cert, navigate back to the NSX-T manager. Select the csr and select “Import Certificate for CSR”.
After importing the certificate, it will show up in the certificates list:

Applying the Certificate
Now that we have our signed certificate, we still need to apply it to the NSX-Manager. This has to be done by executing a REST-API call. The call is an authenticated call to:
https://nsx-manager.corp.local/api/v1/node/services/http?action=apply_certificate&certificate_id=CERT_ID_HERE
Before we can perform the call, we need to retrieve the certificate ID. If we navigate to the Certificates tab in the NSX-T Manager, we can click on the “ID” column of our certificate. This will show the entire ID:

Copy that ID, keep it somewhere close. Open your Postman and create a new request. In the request builder choose “POST” as method. the URL is the one above. Replace “nsx-manager.corp.local” with your own hostname and the ID with the copied Certificate ID.
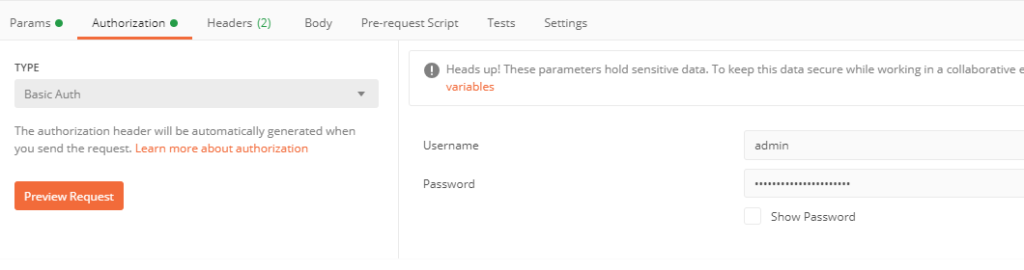
In the Authorization tab, choose “basic auth” and fill in your NSX manager admin user / pass (or another user with sufficient rights)
In the headers tab, add the “Content-Type” header with value “application/json”:

Click send and double-check you receive a 200 response code. Your NSX-T manager should now use your own signed certificate!